How to make a country pool with your hands. How to build a pool on your site with your own hands? Types of country pools and their features
To make a pool in the country or suburban area, it is not necessary to have in-depth knowledge in the field of construction, but it is worth getting acquainted with the features of manufacturing technology. In order for the installation of the pool to go without much hassle, we will consider several basic types that you can build with your own hands, as well as the sequence of construction of the capital structure and methods for installing the summer tank.
Types of pools
The choice of the type of pool is largely due to the size of the area allocated for construction, and the time of the year the operation of the facility is planned.
The basis frame pool - solid steel sheet with multilayer protective coating. This is a seasonal building, which is equipped with a cup bag made of PVC film, so it does not need additional waterproofing. The package includes hoses, a cartridge filter, a ladder, nozzles for water discharge and intake. Before installation, it is necessary to prepare a sand cushion, at least 200 mm thick.

Stationary pool- a capital construction with a concrete base, as finishing materials for which tiles or mosaics with a minimum percentage of water absorption are most often used.

Plastic pools- ready-made polypropylene or plastic tanks with acrylic coating. Depending on the composition of the base, fiberglass, polypropylene and composite are distinguished. The most popular are stationary pools made of polypropylene, which have increased resistance to damage and the effects of aggressive substances.

DIY summer pool
First, it is necessary to prepare a gentle pit of arbitrary shape with a wall slope of no more than 25 degrees. Both the walls and the bottom of the base under the bowl are leveled and rammed with special care, and the irregularities are covered with sand.
Further fit waterproofing material- a film for the pool or tarpaulin. To do this, the film is soldered with an iron, and the tarpaulin is sewn with a double seam. The material for waterproofing is laid with a margin of half a meter along the edge of the tank. The edges of the film are pressed with blind areas made of wood.
Installation of the pool can be made on any soil. After all, water in this case is held not by soil, but by a film. The bottom of the tank is covered with sand in order to prevent lifting and damage to the waterproofing material.
The drainage system is simple: a trench is dug at the bottom, in the very lowest point which the hose is installed. The free end of the hose is led out above the water level in the bowl.
This design is a great solution for summer residents. After the end of the season of the family's stay in the country, the water is drained, and the waterproofing material is stored in the utility room until the next season.

Construction of a swimming pool with a concrete base
The edges of the bowl of a stationary pool can be flush with the floor or rise above it. In the first case, the pit should be much deeper. Consequently, the time to complete the work will also increase.
Pool design and site preparation
The pool project is not only a graphic representation of the structure. This concept also includes calculations related to the summing up of communications, the location of equipment and embedded elements.

After completing the project, they begin to dig a pit. In some cases, the bottom under the pool is equipped with drainage.

The base for the tank is prepared taking into account the allowance of 30 cm in depth and 60 cm in width. The bottom and walls of the bowl are lined with mineral wool, polyurethane or foam for thermal insulation. Then the concreting is carried out.

Bowl concreting
At this stage of construction, it is necessary to lay a layer of concrete about five centimeters. After that, the frame is assembled from reinforcement. Then the bottom and walls are concreted. Further, formwork is erected from the boards and the rest of the structure is poured, taking into account the slope towards the drain. A gutter (3-4%) is made in the upper part of each of the walls. So the paths around the bowl will always be dry. During the pouring process, a pipe with a diameter of 10 cm is laid in the gutter. When the concrete “grabs” a little, the pipe must be removed. For denser filling of the volume with concrete, special vibrators are used.

When the concreting of the bowl is completed, they begin to make tracks. To do this, it is necessary to prepare the plane - level it with sand, or remove excess soil and lay waterproofing. If the staircase is concrete, then its manufacture is started even during the pouring of the bowl. Ergonomically justified step height - 15 cm.

Summing up the main engineering systems
Pool engineering systems - a set of devices responsible for draining and supplying water. In order for the water to circulate better, a skimmer and inlet nozzles are installed. Skimmer - a device for taking water from the surface. The water then passes through the purification system and is returned to the tank.
Through the nozzles, the water that has been cleaned is returned to the pool. Due to contact with the rotating surface of the nozzle, the water jet changes its direction. This improves the flow.
The diameter and the total number of holes depends on the intensity of use of the pool, in other words: on how often the water in the tank will change. As a rule, when designing a water supply system, the estimated filling time is 1-3 hours.
During construction, a drain pipe is laid at the bottom of the pool, with the help of which the tank is drained. To prevent clogging of the pipe and increase the efficiency of the outflow, the diameter of the hole should be at least 10-15 cm. The drain itself is located as low as possible and is taken in by a protective screen or grate designed to protect the drain hole from large debris and foreign bodies that have entered the tank. Water is drained through a pipe into a sewer or sewer.
It is practically impossible to ensure the outflow of water in the case when the pool is located below ground level. In such a situation, an electric pump will come to the rescue. It is easier and more efficient to use a stationary pump than a downhole type unit.
The bestway pool is quick and easy to install yourself.
Pool waterproofing
Properly executed waterproofing protects the pool from corrosion and prolongs its intended use. Waterproofing is also needed to protect the load-bearing structures from the effects of water. At this stage of work, the main thing is complexity. According to building codes, both the internal and external walls of the facility are insulated.
During the construction of a new pool capacity, so-called working (or “cold”) seams are formed at the joints of the structural parts, which can leak. To eliminate this problem, it is imperative to perform sealing of the seams. To this end, before pouring concrete, sealants are laid at the joints - most often waterstops made of a durable polymer.

Another highly effective sealing method is the use of a swellable bentonite cable or filling with a Plow sealing profile. For pool waterproofing, it is not at all necessary to invite a highly specialized specialist. This stage of work is quite within the power to perform on your own, subject to the competent choice of materials and compliance with the technology of their application.
Pool ventilation
If the pool is indoors, then effective ventilation is indispensable. Air ducts are sealed, conduct thermal insulation. The supply air must not be directed to the surface of the water. The mobility of air flows at the water table should also be minimal, otherwise evaporation will increase.
If a small exhaust system is installed, then it can be placed between the main and suspended ceilings. Installing an air conditioner is not recommended.
Finishing work
If there were no problems at the previous stages, you can enter the final stage of construction - finishing work. Traditionally, the inner surface of the pool is lined with tiles with reduced water absorption capacity, mosaic or PVC film. In order to protect the tank from ground pressure, the perimeter of the pool is surrounded by brickwork, most often including decorative stone trim.
Another, the most modern way to finish the inside of the pool - self-leveling floors. The pre-leveled surface is poured with a polymer solution, which, solidifying within 48 hours, forms a durable, impermeable, mechanically and thermally resistant coating. Bulk floors for the pool are also very beautiful, because from under the water column a dolphin or fish can glance at the owners. These are self-leveling floors with a 3D effect.

pool lighting
When selecting fixtures for the pool, it is necessary to take into account the ability of water to reflect light. Depending on the size of the bowl and the room, one of the types of lighting is chosen: contour, general or tank lighting.
Safety class 1 and 2 devices are installed as overhead lighting. Recently, LED lamps and halogen lighting sources on rail systems have been popular. An interesting move is the illumination of the bottom of the tank when the lamps are located under water. Sometimes, if the pool is large, contour lighting is used using fiber optics, which is quite sealed and does not conduct electricity.

Pool equipment
Perhaps the main thing in the list of necessary pool equipment is still filtering equipment, the task of which is to purify water from microorganisms and particles that contribute to its pollution. Water purification can be carried out both periodically and continuously (depending on the volume of the tank).

The device includes a circulation pump, a filtration tank, a multi-way valve and the filter element itself - hydroanthracite, sand or quartz gravel. To clean the filter, it is washed by starting the reverse stroke. The service life of the filter filler is on average two years.
In addition to the filter unit, pool chemicals are used. Reagents based on active oxygen and chlorine at the correct dosage are quite safe for humans.
Indoors, it is advisable to use a dehumidifier - a device to reduce humidity.

For additional comfort, equipment is installed that provides heating for the pool: heat exchangers, solar systems and instantaneous electric heaters. For a pool with a large area, this method is better not to apply. Connected to central system heating exchangers heat water by redistributing heat. This method is the most economical. An electric heater works a little differently. Water heating is produced by heating elements, the power of which is determined by the volume of water. With small volumes, this type of heating is quite justified.
For additional comfort, equipment is installed that provides heating for the pool: heat exchangers, solar systems and instantaneous electric heaters. For a pool with a large area, this method is better not to apply. Heat exchangers connected to the central heating system heat the water by redistributing heat. This method is the most economical. An electric heater works a little differently. Water heating is carried out by heating elements, the power of which is determined by the volume of water. With small volumes, this type of heating is quite justified.

And so the construction of the pool came to an end. Draw water, check for leaks, open the dampers and turn on the filter in flushing mode, and then set the valve to the “filtration” position. The pool is ready to use!
(19
ratings, average: 4,11
out of 5)
 In the summer it is always nice to swim in cool water. However, it is not always possible to go to a river or lake. In this case, the best solution would be to build a pool with your own hands in the country or on the territory of a frequency house. So, you will always have your own reservoir at hand, near which you can have a great time and relax. In the article, we will consider how to build a pool with your own hands.
Features and types of pools
 There are many variations on the theme of pools for summer cottages or country houses. But they can be conceptually divided into several main types.
Inflatable pools. Let's start with the simplest option. Its main advantage is low cost and ease of installation. In addition, this model is mobile.
When packed and assembled, it can easily fit in the trunk of a car. And this means that you can take it with you to nature, use it for a bath, or simply install this pool in your house without any problems with your own hands.
Among the modern models of this category can be found containers of various sizes- from mini-pools for giving like children's "paddling pools" to large inflatable structures that are designed for 10 tons of water or more.
The disadvantages are primarily fragility inflatable pools : they wear out in just a few years. And also it is impossible not to say about their vulnerability from various kinds of mechanical influences.
Frame pools
 They are also fairly simple structures. Their main advantages include mobility and high speed of installation, which, in principle, is characteristic of any prefabricated structures. At the same time, they are more resistant to mechanical damage, unlike inflatable ones. However, an inflatable pool for the owners will cost much less than a frame one. At the same time, the service life of these pools, according to by and large also limited, like every mobile design.
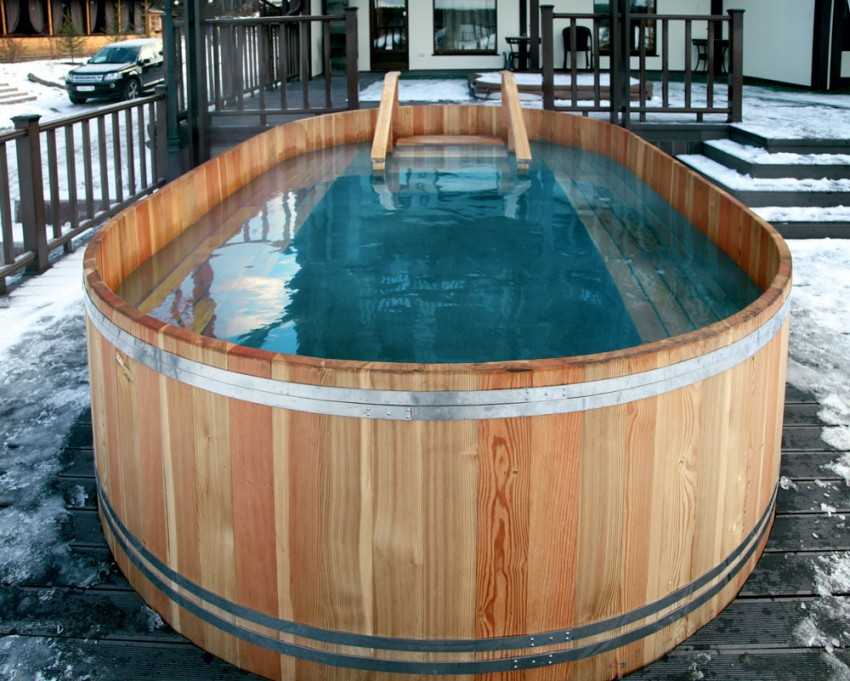
Portable bath pools
 These structures consist of a PVC cover, walls and bottom. Given the depth, they can be located simply on flat surface- depth up to 0.8 m, partially - up to 1.3 meters or completely (more than 1.6 m) go deep into the ground.
Their any form can be, but, as a rule, there is an oval, round, in the form of a figure eight. If these structures are square or rectangular, then their corners are certainly rounded.
Such pools are good because they easy to install(especially those that do not need to be deepened) and just connect. Their disadvantage is the tightness of the connecting seams. However, if you buy a swimming pool in the bath of a trusted company, then it will serve you well for many years.
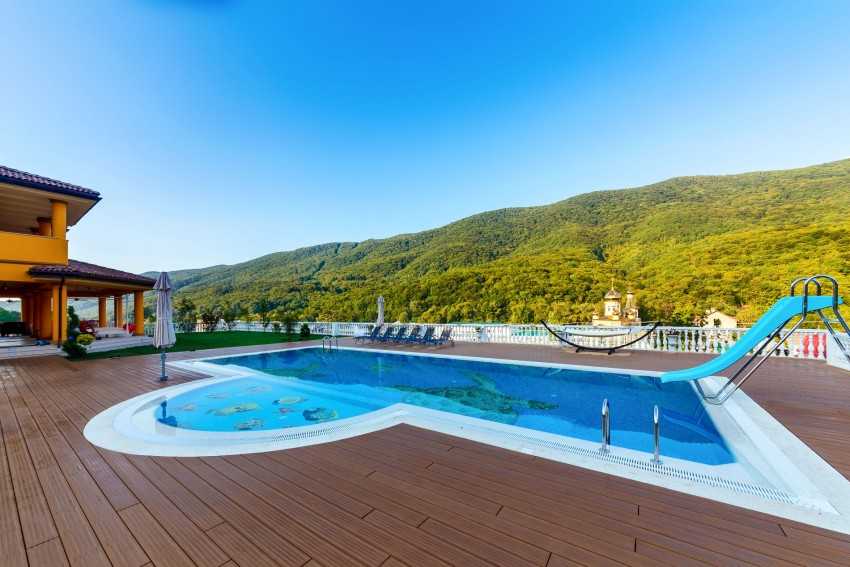
Stationary pools
 We must begin with the obvious shortcomings of these designs: of all varieties, they are the most expensive- in terms of not only the arrangement of the pool, but also its further maintenance.
But this is where all the shortcomings end. Since stationary outdoor pools are fundamental structure so to speak, for centuries.
Stationary pools can be with a concrete bowl or already finished. A concrete bowl allows the owner to build any pool at home, even the most bizarre form. At the same time, pool bowls made of composite materials greatly facilitate the process of arranging a pool on the site.
Gallery: swimming pool in the country (25 photos)


Choice of location and optimal size
 Because it stationary pool is considered “real”, then in the future we will talk about this particular design. So, when you have decided on the type, you need to think about the size and location of the artificial reservoir itself. For the most part, the choice of location will depend on the wishes of the owner. As a rule, the pool is installed close to recreation area, near the bathhouse, behind the house. But when choosing a place, it is necessary to take into account certain factors:
- Presence of nearby vegetation. It is desirable that there are no bushes, let alone trees, near the reservoir. Plants are constantly drawn to moisture, and their root system is very strong and can easily break through a concrete thicket.
- Direction of the wind. Since this summer cottage pool is outdoor, there is a high probability of all kinds of garbage getting into it. In order for you not to encounter dry leaves, scraps of paper, etc. while swimming, it is better if the pool is located on a site protected from the prevailing wind direction.
- Priming. A lot depends on the properties of the soil. For starters, it is desirable that the soil is clay. In this case, you will additionally receive natural waterproofing. And also during the construction of a stationary bowl, you will need to dig a pit. When the soil is rocky at the chosen place, earthworks can be very time-consuming and complicated, especially if you make a pool with your own hands in the country without the help of special equipment.
When it comes to the size of the future reservoir, in this case there are no special requirements. It will depend from your preference and free space. For example, for swimming along one track, a width of 2.5 m and a length of four meters is sufficient. When two tracks are planned, the width can be increased to 5 meters.
The optimum water depth is 1.5 meters. But in this case, it all depends on the purposes for which you build it. When you have children and the main purpose of the pool is to entertain them, you don't need to make it very deep. And vice versa, when you are a fan of diving, the depth plays an important role.
Construction stages
By and large, the process of building a pool in a country house is divided into the following stages:

As you can see, there is a lot of construction work. Moreover, any of the stages is very important, since it depends not only appearance the whole structure, but also the operating time.
Bowl creation and earthworks
 Let's go directly to the main question - how to make a pool in the country with your own hands. If you have decided on the installation site and size, then you can start earthworks. First to the site apply markings. For what you can use a rope stretched on pegs.
Then we start earthworks. This is the most time-consuming stage during construction. You need dig a pit desired depth and size. Moreover, it must be borne in mind that the depth, length and width must be made approximately 50 cm more.
This additional space is required for formwork. When the dimensions of the design you have conceived are very impressive, then you need to think about attracting special equipment.
Then, when the pit is dug, you can start making bowl. This stage of work includes the following activities:
- The walls and bottom of the pit are well rammed.
- A sand cushion is being made. Why a layer of sand 25–40 cm thick is poured onto the bottom and carefully rammed.
- A layer of waterproofing is applied over the entire surface of the walls and on top of the pillow at the bottom. Now on the market you can see many materials that are an excellent barrier to water. The most budgetary is the use of bituminous mass and roofing material. These materials have shown themselves well and have been used for a long time.
- First, a layer of roofing material is laid over the entire surface (on the walls and bottom, while the walls must be covered with material with a margin to the very top). After that, several (preferably 4–5) layers of bituminous mass are applied.
- The next step is the installation of the drain system. This must be done before formwork. How many drain holes to make and in what place depends on the shape and size of the bowl.
- Then we construct the formwork, it can be made from improvised materials and proceed to pouring concrete. And be sure to use reinforcement.
- The formwork is removed after the concrete mass has set.
Lighting and decoration
 Then you need to finish the bowl. But first, you need additional apply a layer of waterproofing.
And also you need to close up all the cracks that have formed so that the water does not leak out and damage the bowl. To do this, you can use mastic, film or impregnating materials.
After installing the waterproofing, proceed to the finishing work. As a rule, to cover the bowl is used tile. This material can easily withstand prolonged exposure to water, is very easy to clean and has an attractive appearance.
In addition to tiles, you can also use modern material, for example, PVC film. Today, manufacturers produce a huge range of this material. It is durable and strong. On this, the construction of the pool, in fact, is completed.
 In artificial reservoirs, the water becomes polluted rather quickly and can be a favorable environment for the appearance of harmful bacteria. At the same time, in open pool all the time gets dust, tree branches and fallen leaves.
For small pools build a cover, which will not allow the main part of the garbage to enter. Small particles that have fallen into the pond can be easily removed with a fine mesh net. Algae that formed on the walls, cleaned with a soft bristle brush.
The water in this pool is desirable replace at least once a week. For example, use for watering the garden. To purify water in large pools, the following methods are used:
- Electrophysical disinfection - the use of equipment for saturating water with silver ions and ozonizers. UV lamps can be used to filter and purify water, they disinfect water by killing mold spores and microbes.
- Chemical treatment - produced with the help of special substances. As a result, the pH level is normalized and the water is disinfected. The action of chemicals prevents the appearance of algae and eliminates the smallest particles of fat.
- Physical cleaning - cleaning small and large debris with a net. Constant cleaning with a water filter. Cleaning the inner surface with a vacuum cleaner and a brush.
Features of water purification in the pool
 The easiest way to purify water is a water filter. There are three types of systems with different degrees of filtration. sand filter
based on finely crushed quartz removes harmful microparticles up to 25 microns in size.
The easiest way to purify water is a water filter. There are three types of systems with different degrees of filtration. sand filter
based on finely crushed quartz removes harmful microparticles up to 25 microns in size.
Cartridge filters suitable for medium-sized artificial reservoirs with a diameter of no more than five meters. These filters are equipped with a special valve for getting rid of small debris and a water purification system from harmful elements up to 15 microns in size.
Diatomaceous earth filters are highly efficient and modern systems water purification. Fossil powder, kieselguhr, mountain flour, etc. are used as a cleaning agent. These particles remove the smallest elements up to one micrometer in size.
As compositions for chemical cleaning, means are used based on active oxygen, bromine and chlorine. Chlorine compounds are quite effective, but they need to be observed in a clear dosage. If the doses are exceeded, there is a high risk of damage to the skin and poisoning.
Bromine-based preparations are safer and do not have a pronounced odor. Cleansing with active oxygen is the most convenient and at the same time completely safe for health. The drug is added to the water immediately after filling the pool, taking into account the total volume of liquid.
A pool on a personal plot or in a country house is great place to relax on hot summer days. And building it with your own hands is not very difficult. You can build a reservoir from improvised materials, but it is much more reliable to make it from concrete.
Apply markings, make calculations, dig a pit, fill the bowl and finish. This main stages of work. A little financial investment and effort, and you will have a great vacation spot for the whole family.
Build your private pool and enjoy it all summer long - these are the thoughts that now control you. In addition, your kids will also be crazy about the joy that a small pool of cool water will give them on a hot day. And today we will look at how to build a concrete pool with our own hands, what are its advantages and disadvantages, and for whom it will be ideal option.
What you need to know first
Before building anything, you need to understand the design features, its advantages and disadvantages, as well as similar options. Perhaps concrete is far from the most ideal option for you, and it would be much more rational to install, for example, a frame pool.

Let's first take a look positive sides of this material for the construction of artificial reservoirs.
- The most rigid construction of the pool is obtained from concrete;
- Freedom of choice. You can build a bowl of any size, depth and shape;
- Possibility to install any additional equipment. You can mount hydromassage, and so on;
- Concrete is the most durable material of all similar for the construction of tanks;
- Large selection of finishes and decorations;
- In general, a concrete pool looks more prestigious than all the others.
Now about the shortcomings of this material.
- Extended construction time. If you build a reservoir in the spring, then you can enjoy the cool water in it only in the middle of summer;
- High price. How much exactly? We will talk about this in more detail below;
- Not the most service-friendly option.
- For self-installation, you need to have skills in construction and experience with tools.
As we can see, even concrete bowls are not without flaws, in principle, like all other options. This option is suitable for those who are not going to save on the construction of an artificial reservoir and want to install the maximum number of additional devices to increase comfort and decoration.
So, if you have decided that a concrete pool is what you need, then read on.
Concrete pool device
A pool with a concrete bowl device does not differ much from other types. It has the same systems that do the necessary work to keep the water in the right condition.

Concrete pool systems:
- Pump;
- Temperature control devices;
- Filters of various types.
It is also possible to install additional devices:
- Automatic dispensers of chemicals;
- contour;
- Hydromassage, counter flow, waterfalls, fountains;
- Slides, trampolines and other attractions.
Holes for nozzles for the intake and return of water to the bowl are installed immediately when pouring concrete. Next, a circuit is connected to them, consisting of a pump, filter and heater. How to connect this equipment depends on your conditions and device models. After installing the circular circuit, consider that the pool is ready for use.
You can install additional equipment after the completion of all construction work, but it is still better to think everything over in advance and do it in one go.
Now let's look at each stage in great detail.
Let's start construction
We divided the process of building a concrete pool with our own hands into several steps. The result is a detailed guide that will help you do everything yourself.
Construction layout
Any great undertaking must begin with a plan. You need to draw a bowl on paper with indications of its dimensions. Also in the drawing, you need to reflect the location of the equipment and its connection to the pool and the electrical network.

Decide on the depth of the bowl. If it is intended for adults, then 2 meters is just right. If for children, then it all depends on their age and height. When installing a diving board, the depth must be at least 2.5 meters.
Planning is a serious and responsible business. Under no circumstances should you rush. Do not start work until you are sure that your drawing is correct and specific.
Only after creating a detailed plan for this, you can start work.
Digging a hole and preparing a pillow
The next step is to choose a place, dig a pit and prepare a pillow for the foundation.

The place should initially be as flat as possible. The supply of electricity and water supply should also not cause problems for the future tank. Pay attention to these two points when choosing a location.
We clear the area from plants, large stones, and then proceed to dig a hole. You can do it yourself, but this approach will take a lot of time and effort. If possible, contact a team of private workers or even the services of an excavator. This will greatly speed up the process and bring you closer to the final work.
Pit requirements:
- The bottom of the pit is 20-30 centimeters lower than the bottom of the future pool;
- The walls of the pit with a margin of 15-20 in each direction from the walls of the concrete bowl;
- The side walls should have a slope of 6-7 degrees to the outside;
Compliance with these requirements simplifies the installation of the pool. If they are violated, you will either not be able to complete the work at all, or you will do it with big problems.
Next, we install all the pipes that will be brought to the pool. A bottom drain and side nozzles are installed, and pipes go up from them. It is advisable to cover the holes tightly with a rag or film so that dirt does not get in during construction work.

After finally digging the hole, you need to prepare a pillow for the foundation. There is nothing complicated, you just need to fill the compositions in several layers and level them. The first layer is filled with sand by 15-20 centimeters. Next comes crushed stone 5-10 centimeters high.
We level each layer using a board with a level attached to it and tamp it down. If you are pouring cement, let it harden completely and only then proceed to further work.
The last layer is laid roofing material with an overlap or other waterproofing material. It will protect against external groundwater and the flow of the bowl itself.
We fill the foundation
Now you need to install the formwork from the boards for pouring the foundation of the tank. It is recommended that the foundation be made somewhat wider than the perimeter of the pool walls. This will give greater stability and durability to the structure.
The next step is to install reinforcement for the foundation. Bars with ribs with a diameter of 10-14 mm are used. The larger the area and depth of the tank, the thicker the reinforcing bars should be used. The mesh size should be 20 by 20 centimeters.

The wire mesh is installed in two layers. The first is located at a height of 5 centimeters above the pillow, and the second layer is 5 centimeters above the first. Thus, it turns out that the plate will come out with a thickness of about 14-15 centimeters.
For the exact location of the reinforcing layers in a height of 5 centimeters, brick or wooden blocks are used. Professional installers have special stands in their arsenal.
At the site of the construction of the side walls, the bars are bent vertically upwards. Later we will tie the reinforcement for the walls to them. This design is rigid and reliable.
To pour the base, you must first prepare the solution. To do this, you can order a special machine or do it yourself in a concrete mixer. But you need to work quickly so that your solution does not have time to harden while you prepare a new portion.
To prevent air voids from forming in the thickness of the foundation, you can use a vibrator or an ordinary rod. The vibration unit works in accordance with the instructions, and you simply lower the stick into the solution that has not yet hardened and perform circular motions. This will allow air to come to the surface.
Filling the sides of the bowl
First of all, you need to make reinforcement of the side walls. To do this, we tie the steel bars to those that were bent vertically upwards at the base reinforcement.The installation of walls should be started only when the foundation has completely hardened. How fast will it happen? Depends on weather conditions and the composition of the solution itself. On average, this period is 1 week.
The thickness of the walls of the concrete pool and the number of tiers of reinforcement directly depends on the volume of the pool. For a pool of 4 * 4 meters with a depth of up to 1.5 meters, it is permissible to use one tier. The thickness of the walls is 10-15 centimeters. If the area and depth are greater, then at least 2 tiers of reinforcement are installed, and the wall thickness is at least 20 cm.
Next, formwork for the walls is installed. For it, wooden boards, plywood or chipboard sheets are used. All of them must be impregnated with a moisture-repellent composition. The joints of wooden sheets must be covered with some material or sealed.

The poured concrete will put a lot of pressure on the formwork. To avoid deformation or complete destruction of the structure, spacers are installed on both sides. Also, the formwork walls are nailed from above to small bars.
Formwork for steps and other forms of the pool is also installed. Then, carefully, but quickly, concrete is poured into all the walls at once.
Facing
After complete solidification, you can remove the formwork and proceed with the waterproofing and lining of the pool.

For waterproofing, special compositions are applied by spraying or roller. Carefully work out the junction of the walls and the foundation, as well as uneven places in the walls. Let the compound dry completely.
A slight change in water level may be due to normal evaporation of moisture.
For the final cladding, tile, mosaic or film is used. Which to choose? Depends on your budget, preferences and ease of use of the material.

For mounting tiles and mosaics, use only high-quality glue that is not afraid of water. Also, the seams must be treated with anti-fungal compounds. This will significantly extend the life of the cladding and facilitate its maintenance.
Thematic videos
Construction budget
What is the cost of a concrete pool? This question often arises among residents of private homes. Let's figure it out.
If you take all the work into your own hands, then concrete will be the biggest item on the list of materials. You will also need a minimum set of equipment: a pump, a filter and a heater. And less tangible costs will go to tiles, waterproofing and so on.
Don't skimp on equipment. The entire circulatory system should have time to pass the entire volume through itself 2-3 times a day. If this does not happen, the cleaning and heating efficiency will approach zero.
On average, a pool with an area of 10-15 m 2 will cost you 200-300 thousand rubles. Of this amount, approximately 100-150 will be spent on equipment, and the rest on building materials. Of course, you can keep within 150, it all depends on your requirements and desires.
We have given an approximate average cost. Take it as a guide, and when you seriously take up the construction of your own tank, calculate everything exactly according to the prices of your city.
So, today we have analyzed in detail how to build a concrete pool with our own hands and how much this pleasure will cost you. You can also find other step-by-step guides for installing artificial reservoirs on our website.
For those who dream of a pool on their own suburban area, it’s worth saying - you should not immediately run and dig a hole. It is better to first familiarize yourself with the possible options and choose the one that suits you among the huge number of offers.
The choice is really large - from children's inflatable pools to ten-meter monolithic structures.

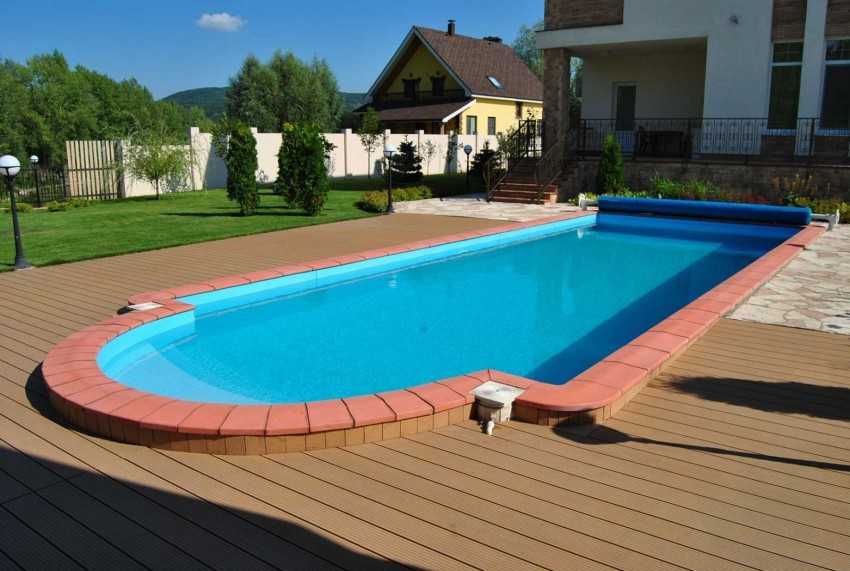
concrete pool
Stationary concrete pool- solid and durable. The best option if you have the necessary funds, time and certain skills, you can independently build it on your site.


The concrete pool is a cast box. A metal frame is placed in a pre-dug pit, then it is poured with concrete. You can build such a pool in a room suitable for this. Required condition– connection to sewerage and electricity, as well as to heating and ventilation.
So, in order to build a pool on your own, you will have to work hard: dig a pit, place waterproofing, prepare the formwork along the contour, pour it with concrete.

When the pool bowl is ready, finishing work begins. It is possible to clad the pool with tiles, polymeric material, natural stone or mosaics at will.

What should be the bowl of the pool
The pool bowl should not be located in close proximity to the foundation of the house in order to eliminate the risk of soil erosion. It is impossible to fill the bowl with concrete in parts, only at once entirely. This will provide a better seal. Therefore, you need to think in advance where the holes for pipes, fixtures, and other needs will be located.

It is undesirable to drill the finished bowl after installation. If the inside of the pool will be tiled, you need to use a special glue and grout for the joints, which are more elastic than usual for dry rooms.

Of course, tile is the most durable and sustainable material in use, provided that the owners can cope with a fairly considerable amount of work.


Mosaic finish
More experienced craftsmen in construction can decorate the pool with mosaics. This, of course, is a time-consuming process, and the material is much more expensive, but the result is incomparably more beautiful. Mosaic is just as durable as tile but looks more sophisticated.

Relatively recently, they began to use such technology as the decoration of pools with PVC film. In this case, you can do without waterproofing and place the film directly on top of the concrete.

This finishing option will cost much less, and installation will not take much time. But the film has its drawbacks: it is short-lived, and the joints of the film webs are quite noticeable.

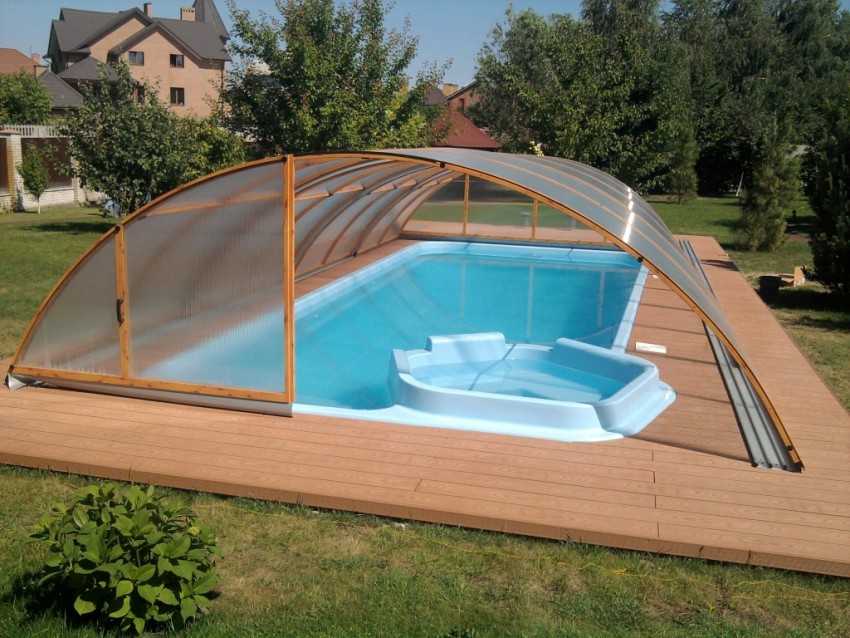
The most popular type of pool today is the pool-bath. This is a ready-made container that you just need to dig in. They are made of composite materials or fiberglass. Such a pool can easily be built on the site by any owner, even inexperienced in construction. A pit is dug, its bottom is covered with rubble, then a “bath” is installed, the gaps along the edges are covered with earth.

This amount of work can be done much faster than in the previous case.

True, there is a nuance: you need to study in advance what the lowest temperature the pool bowl is designed for. Otherwise, everything is relatively easy: such pools are immediately made with ladders;

- the water in them cools much more slowly than in concrete pools;
- waterproofing is very reliable; they are quite easy to care for;
- resistant to fungal growth.


The disadvantages include the fact that it is almost impossible to place such a pool indoors, since a tower crane is required for installation.


Frame pool
This is the easiest and cheapest way to make a pool on the site with your own hands.

Such pools are sold in a large assortment: round, rectangular, oval. Their design is quite simple. The frame is installed first; these can be metal sheets in rolls or horizontal and vertical rods.

After installing the frame and placing the bowl in it, external ladders are installed, a hydraulic pump is connected, which is usually included in the kit along with the filtration unit. If you choose such a pool, you won’t have to dig anything. It is easy to install in one day and easy to disassemble.

But you need to operate it with caution: the bowl can be mechanically damaged.

DIY pool photo